> ## Documentation Index
> Fetch the complete documentation index at: https://docs.gcore.com/llms.txt
> Use this file to discover all available pages before exploring further.
# Manage DNS hosting
The DNS hosting service manages DNS records for up to 25 domains at no cost.
## Activate DNS hosting
Order the DNS hosting service through the control panel to start managing domain records.
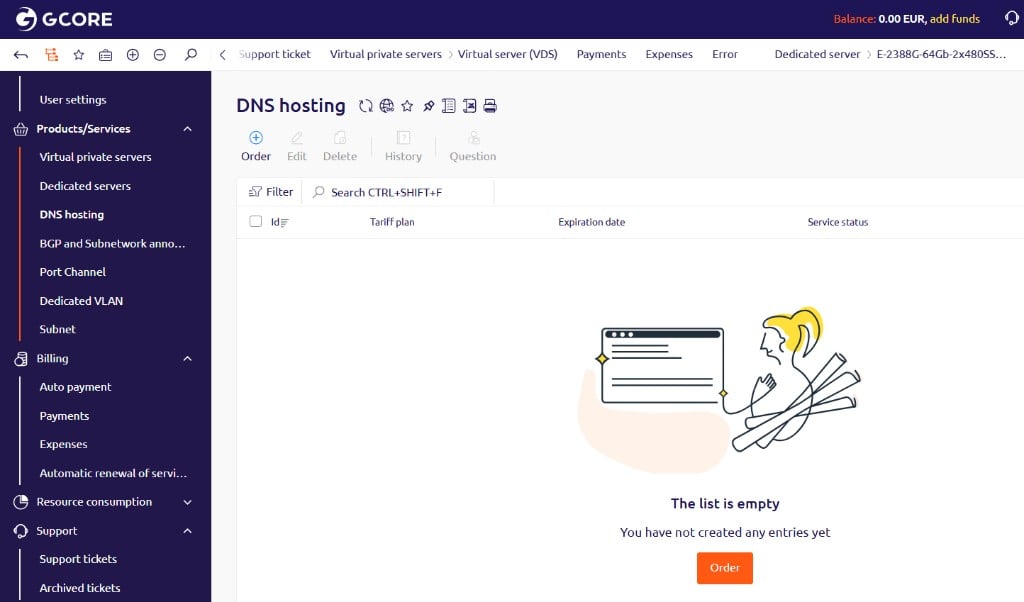
1. In the list of services, click **DNS hosting** and then click **Order**.
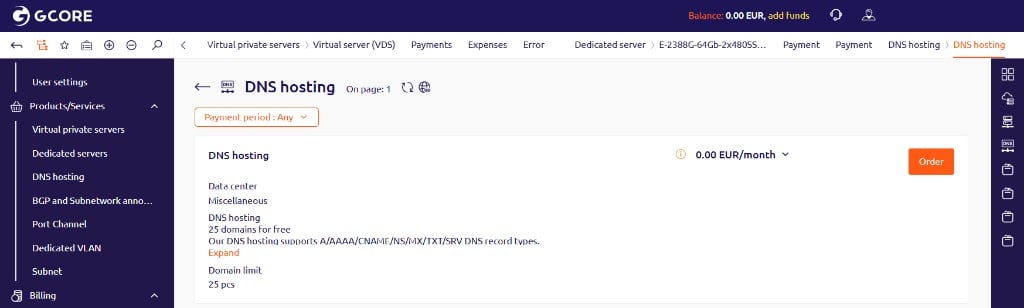
 2. In the window that opens, click **Order**.
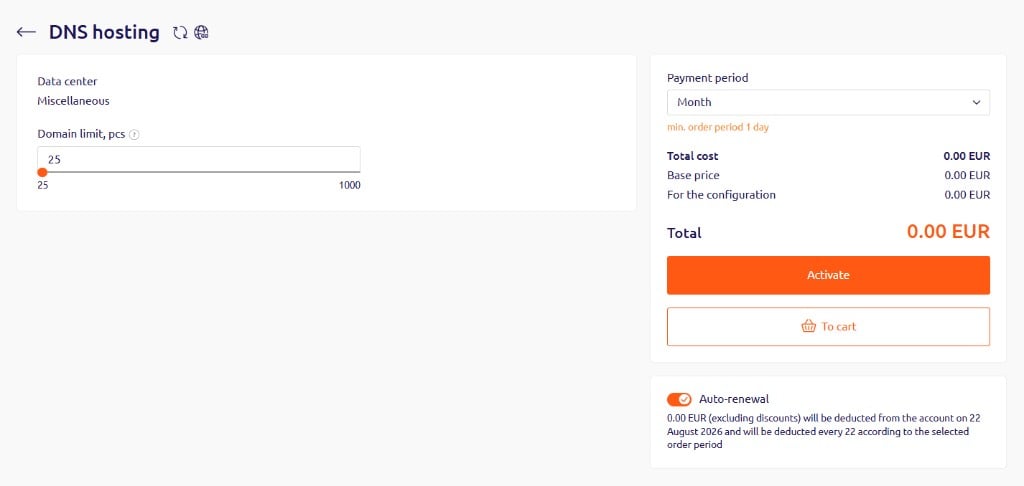
 3. Configure the service parameters and click **Activate**:
* **Domain limit:** Set the number of domains to manage. Default is 25.
* **Payment period:** Select the billing cycle.
* **Auto-renewal:** Enable to automatically renew the service.
3. Configure the service parameters and click **Activate**:
* **Domain limit:** Set the number of domains to manage. Default is 25.
* **Payment period:** Select the billing cycle.
* **Auto-renewal:** Enable to automatically renew the service.
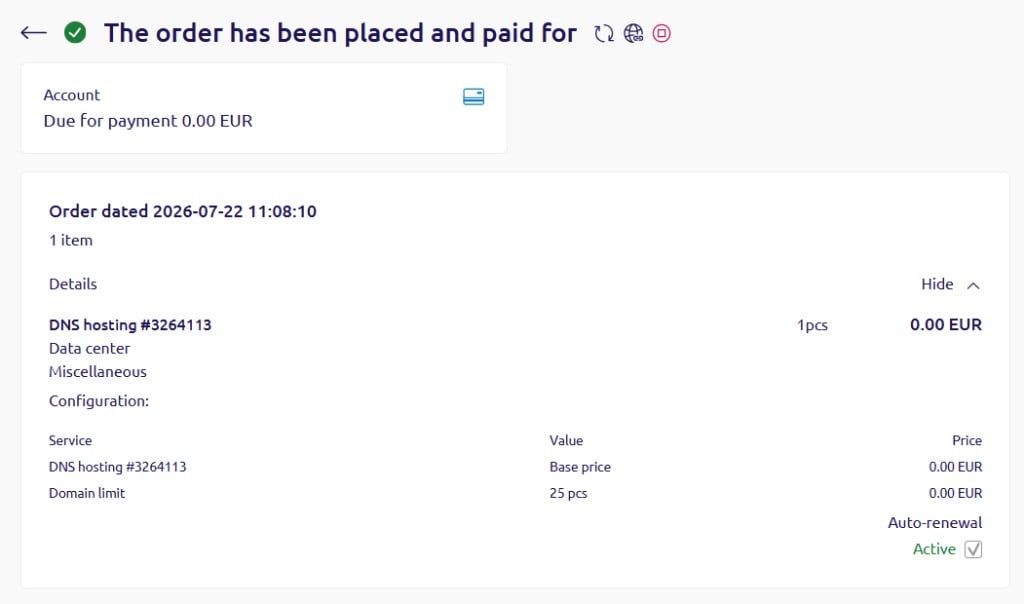
 The confirmation page shows that the order has been placed and paid for.
 ## Set up DNS hosting
Configure the default DNS settings that apply to all domains added to the service.
1. Navigate to the **DNS hosting** service section, check the checkbox next to the relevant service, and then click **To panel**. The DNS hosting control panel opens.
## Set up DNS hosting
Configure the default DNS settings that apply to all domains added to the service.
1. Navigate to the **DNS hosting** service section, check the checkbox next to the relevant service, and then click **To panel**. The DNS hosting control panel opens.
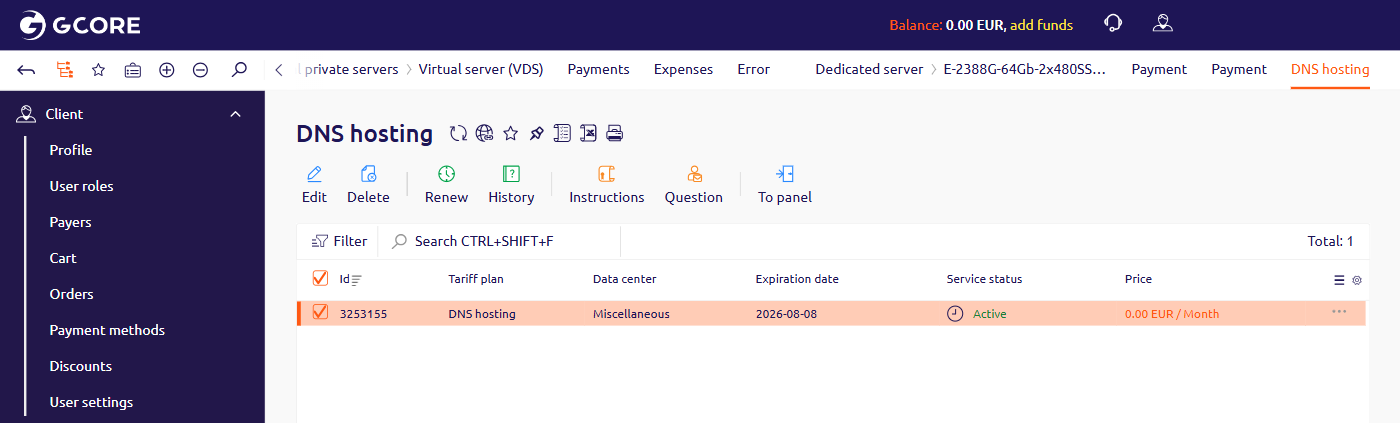 2. In the control panel, navigate to **Settings** > **DNS settings**.
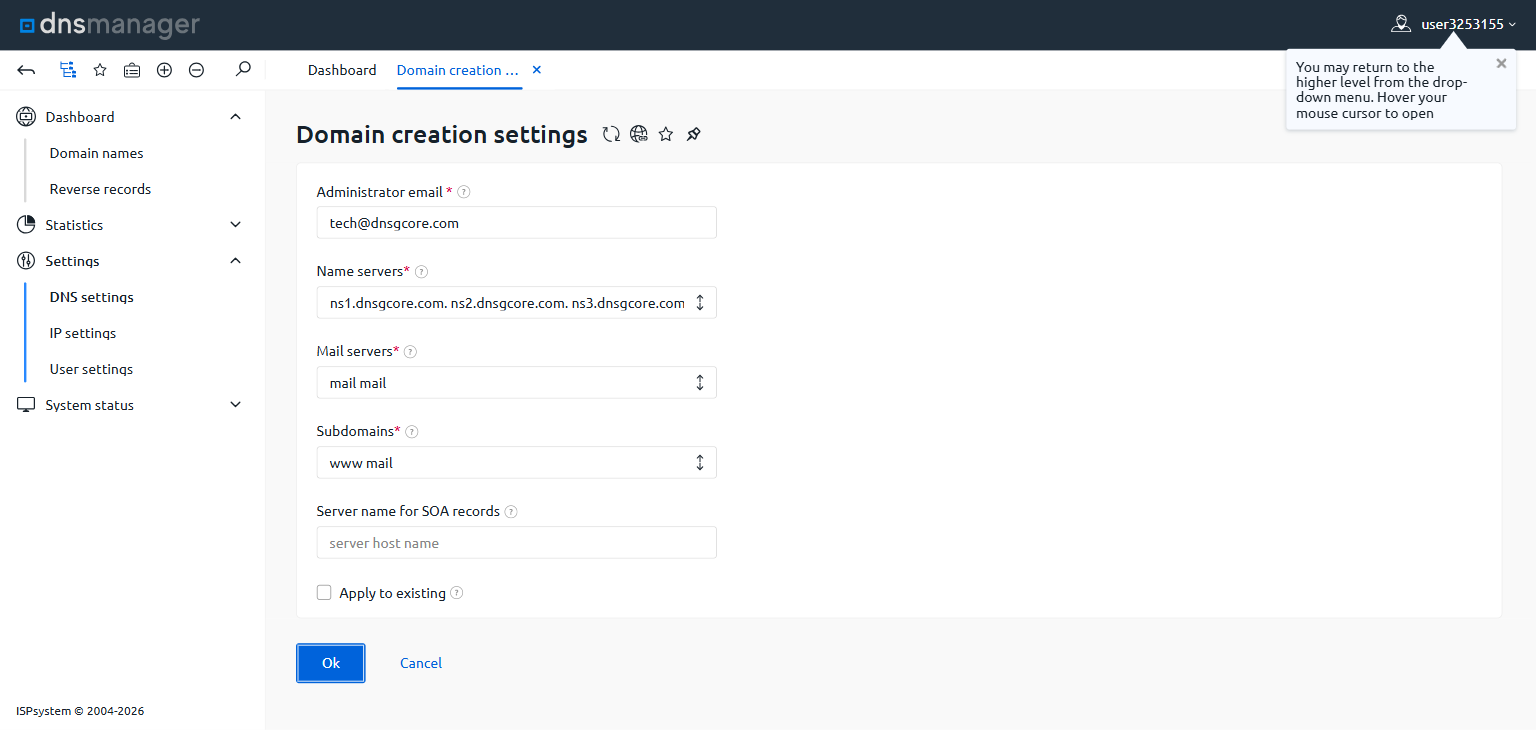 3. Provide the following settings:
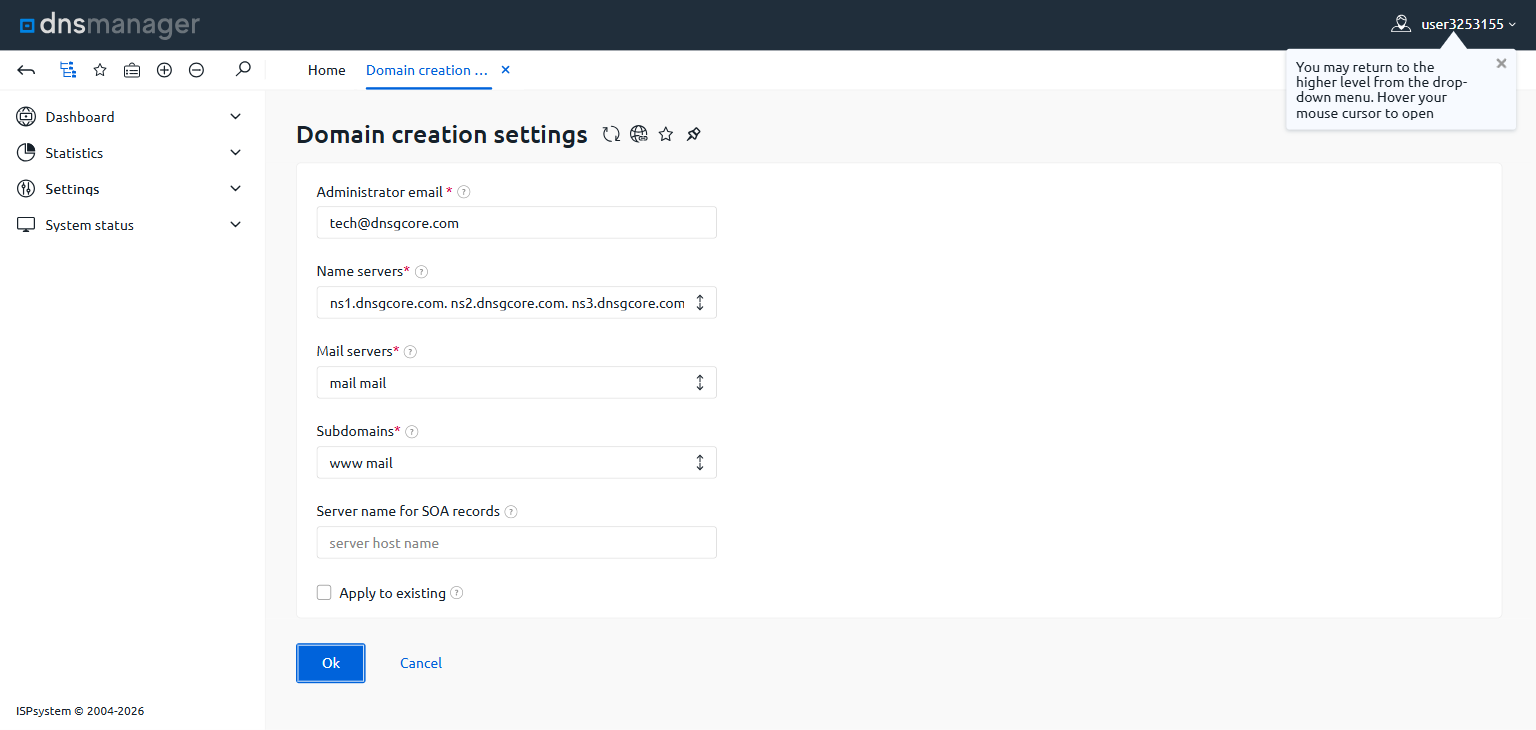 **Administrator email:** Email address listed in the SOA record as the administrator contact for the managed domains.
**Name servers:** Gcore name server values are pre-filled. Do not change this value.
**Mail servers:** Hostnames of the mail servers for this domain, listed in MX records.
**Subdomains:** Subdomains to create automatically and link to the main domain via A records.
**Server name for SOA records:** Host name to use in SOA records. Leave blank to use the default.
4. Click **OK** to apply the settings.
## Manage domains
In the DNS hosting control panel, add and configure the domains to manage.
1. Click **Add a new domain**.
**Administrator email:** Email address listed in the SOA record as the administrator contact for the managed domains.
**Name servers:** Gcore name server values are pre-filled. Do not change this value.
**Mail servers:** Hostnames of the mail servers for this domain, listed in MX records.
**Subdomains:** Subdomains to create automatically and link to the main domain via A records.
**Server name for SOA records:** Host name to use in SOA records. Leave blank to use the default.
4. Click **OK** to apply the settings.
## Manage domains
In the DNS hosting control panel, add and configure the domains to manage.
1. Click **Add a new domain**.
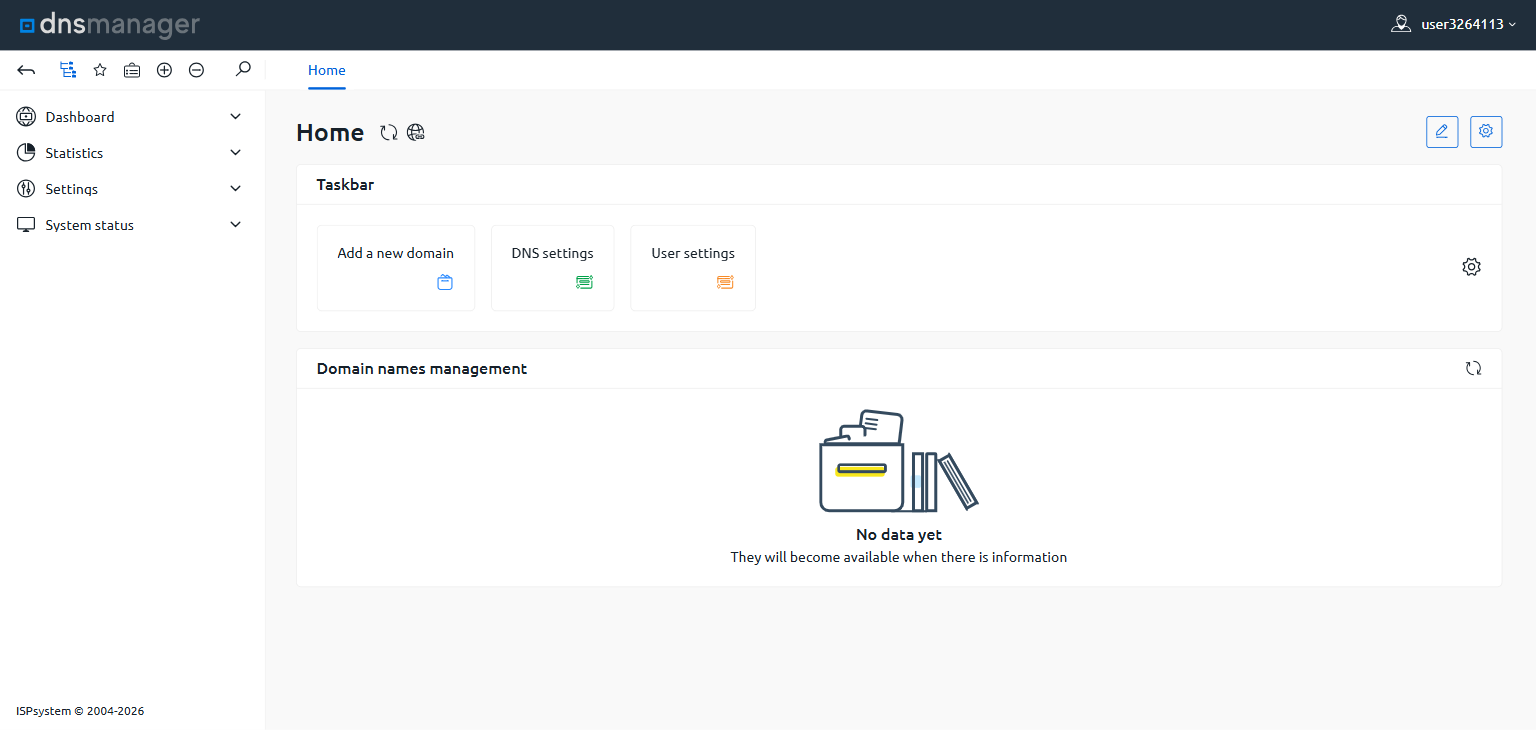 2. Specify the domain to manage along with the associated settings.
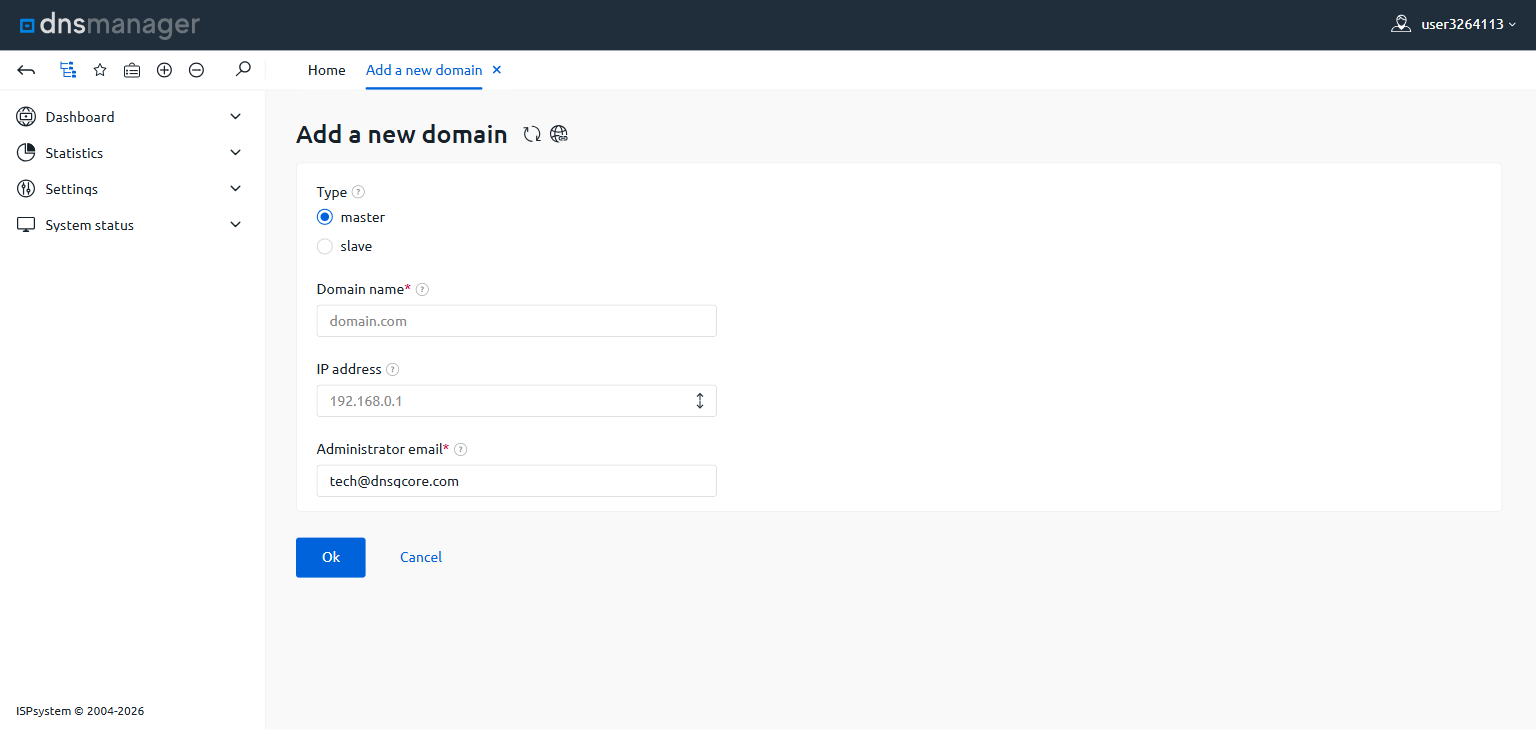 **Type:** Select **master** to manage the domain's records directly, or **slave** to receive records from a master domain.
**Domain name:** Enter the domain for which to manage DNS records.
**IP address:** Enter the IP address of the server hosting the domain.
**Administrator email (for master type domains only):** Email address listed in the SOA records as the administrator contact.
3. Click **OK**.
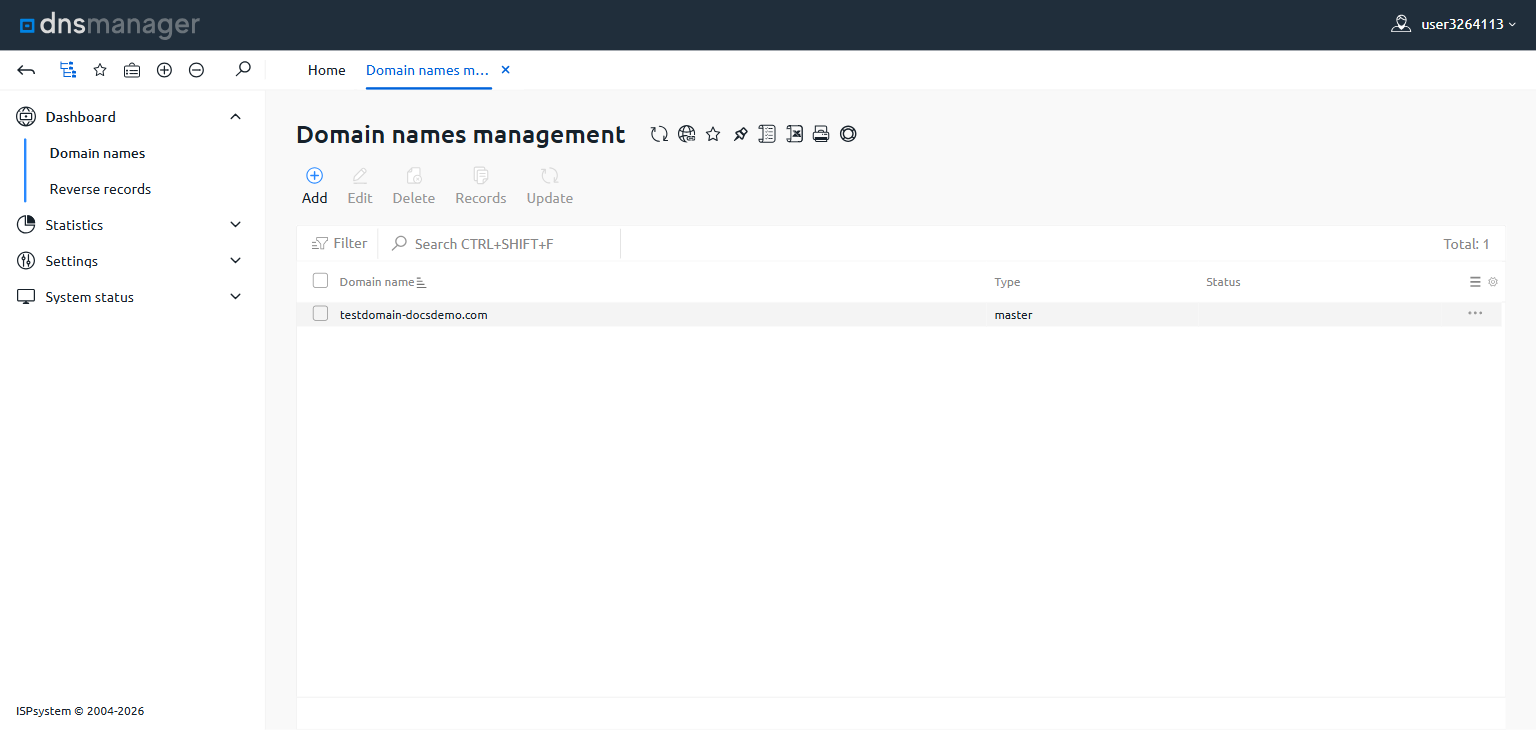
The created domain appears in the **Domain names** list.
**Type:** Select **master** to manage the domain's records directly, or **slave** to receive records from a master domain.
**Domain name:** Enter the domain for which to manage DNS records.
**IP address:** Enter the IP address of the server hosting the domain.
**Administrator email (for master type domains only):** Email address listed in the SOA records as the administrator contact.
3. Click **OK**.
The created domain appears in the **Domain names** list.
 ## Manage DNS records
Configure individual DNS records for each managed domain.
1. In the DNS hosting control panel, navigate to **Dashboard** > **Domain names**. Check the checkbox next to the domain for which to set records. Then, click **Records**.
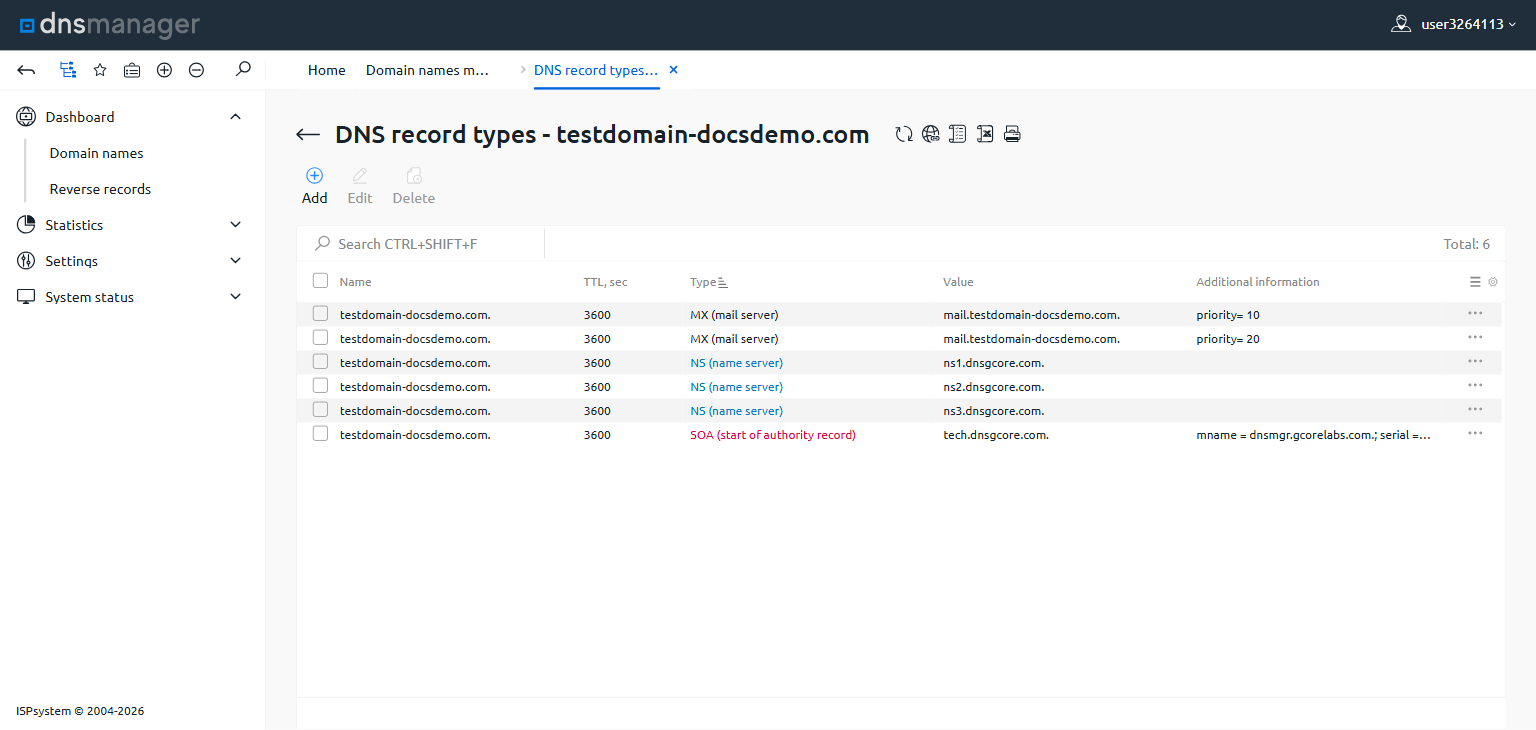
2. The DNS records for the selected domain appear. Click **Add** to add a new record.
## Manage DNS records
Configure individual DNS records for each managed domain.
1. In the DNS hosting control panel, navigate to **Dashboard** > **Domain names**. Check the checkbox next to the domain for which to set records. Then, click **Records**.
2. The DNS records for the selected domain appear. Click **Add** to add a new record.
 3. Configure the new record:
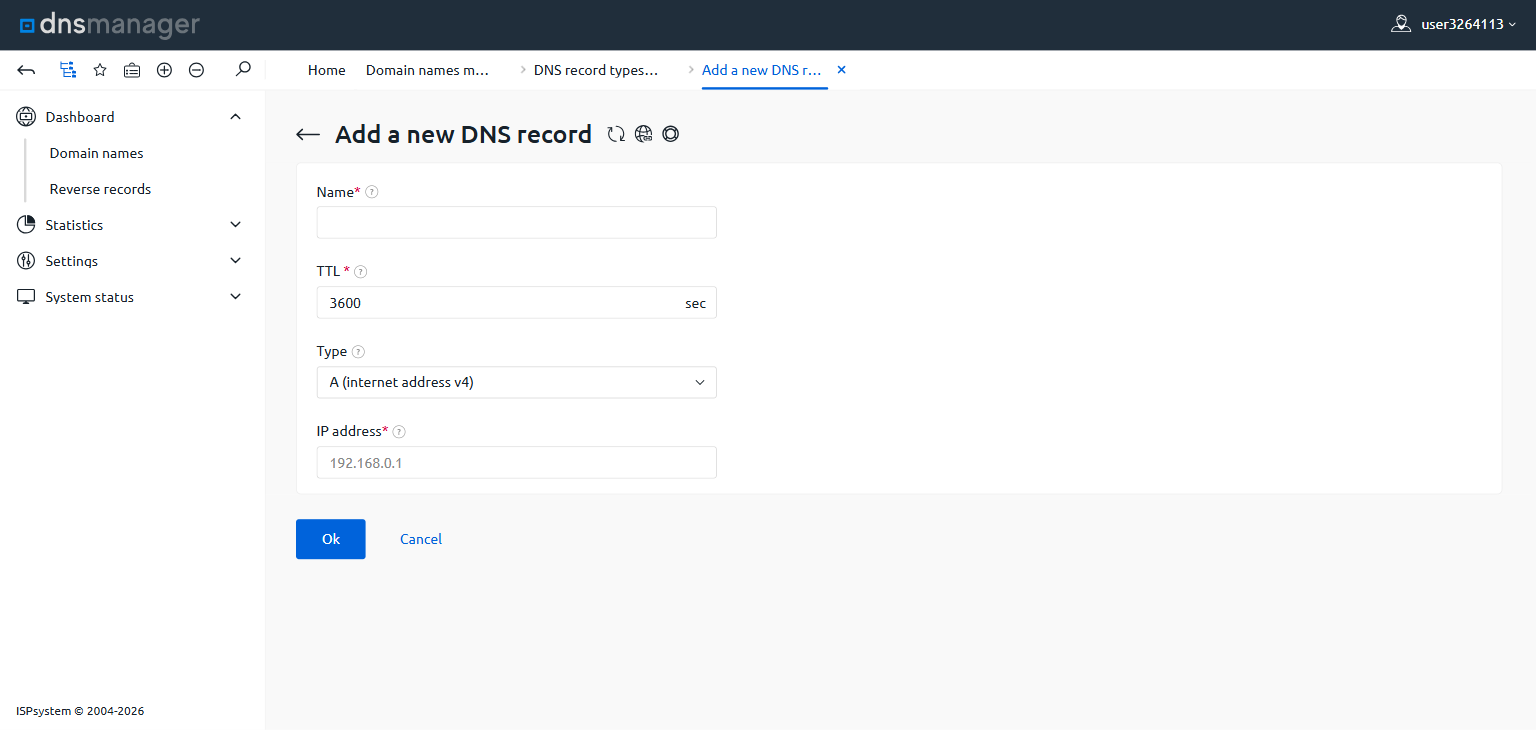 **Name:** Enter a subdomain, excluding the main domain.
**TTL:** Time in seconds for which resolvers cache the record.
**Type:** Specify the type of record.
**Additional fields:** Fill in the fields that appear based on the record type — an A record requires an IP address, a PTR record requires a domain name.
4. Click **OK**.
The record appears in the domain's DNS records list.
**Name:** Enter a subdomain, excluding the main domain.
**TTL:** Time in seconds for which resolvers cache the record.
**Type:** Specify the type of record.
**Additional fields:** Fill in the fields that appear based on the record type — an A record requires an IP address, a PTR record requires a domain name.
4. Click **OK**.
The record appears in the domain's DNS records list.